Create a new auto quote
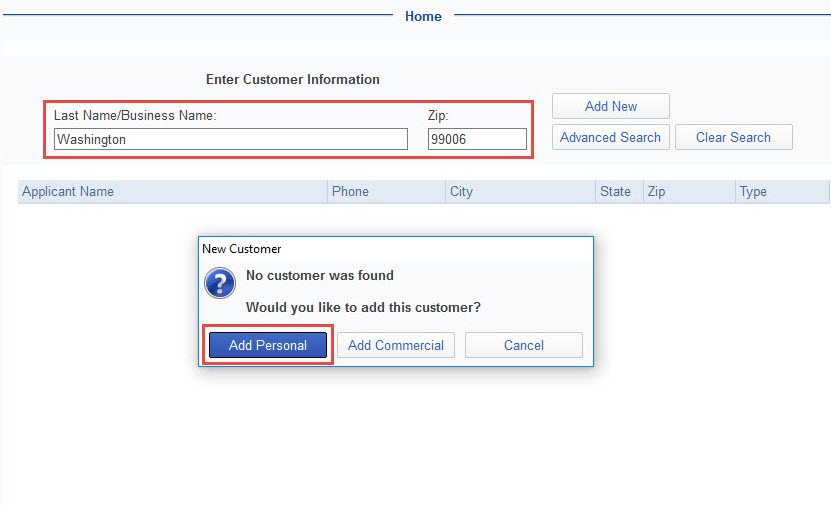
Step1: From the Home or Customers tab, create your customer by entering the last name and zip code. If no customer is found, you will receive a pop up asking if you would like to add this customer. You will be taken to the Customer Center, where you will add your customer’s information.
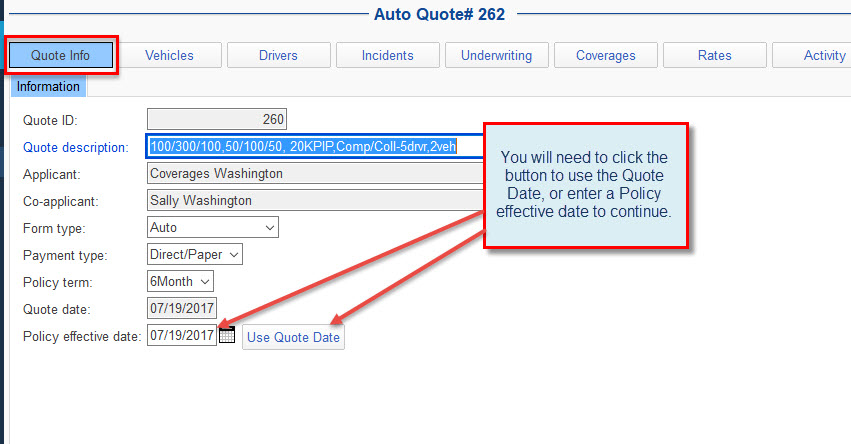
Step 2: Selecting Get an Auto Quote will create a new customer and take you directly in to the Auto Quote, where you will need to input the Form type, Payment type, Policy term and Policy effective date.
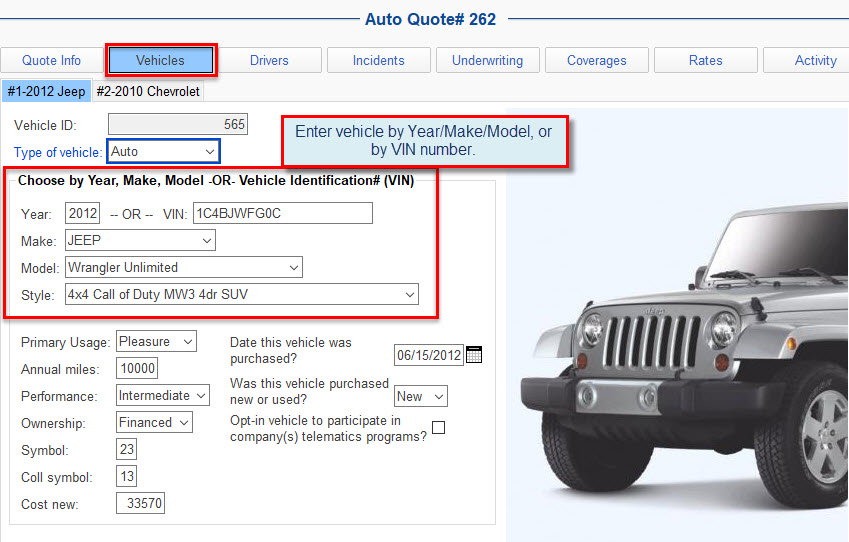
Step 3: From the Vehicles tab you will enter the vehicle by either Year/Make/Model or by Vehicle Identification Number (VIN).
Step 4: From the Drivers tab, enter the Education level, Vehicle driven, State licensed, and Principal driver.

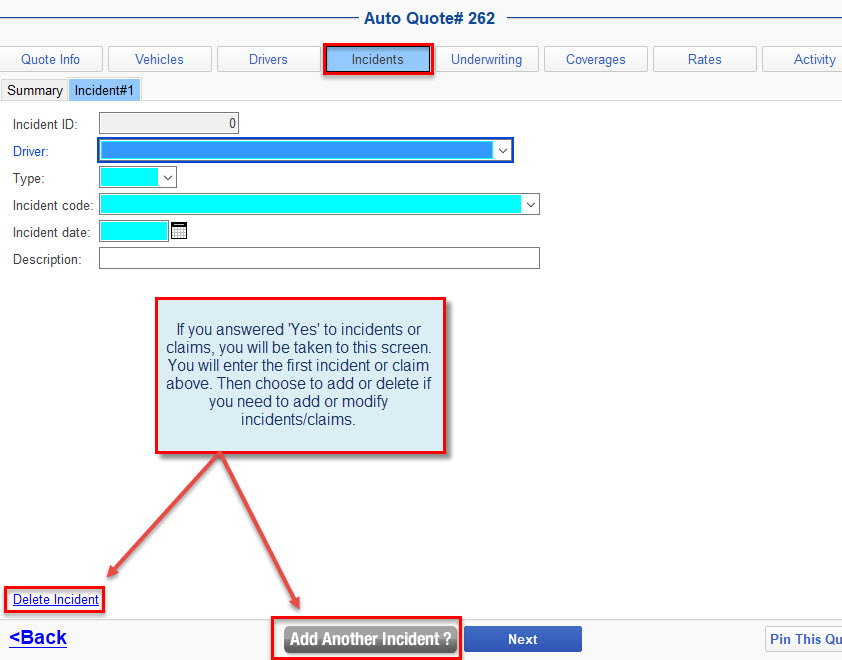
Step 5: At the Incidents tab, you will enter ‘yes’ or ‘no’ if the client has any incidents.
If the client has any incidents, this screen will pop up. You will fill the details out here. You can add or delete incidents from the bottom of the screen.
Step 6: From the Underwriting tab, you will enter Current Insurance, and all Company specific information.
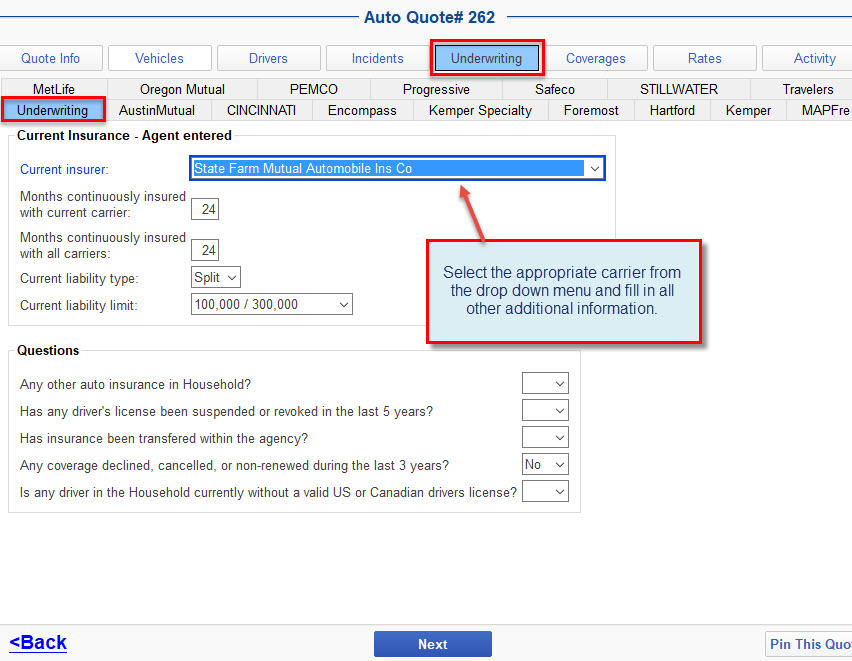
Step 7: Company Specific tabs need to be filled out for each company you wish to quote.

Step 8: You will need to enter the desired coverages here. Comp only can be selected here for any vehicle other than the first vehicle on the quote. If requesting UIM Property Damage, be sure and select the UIM Property Damage check box under Vehicle Coverages.

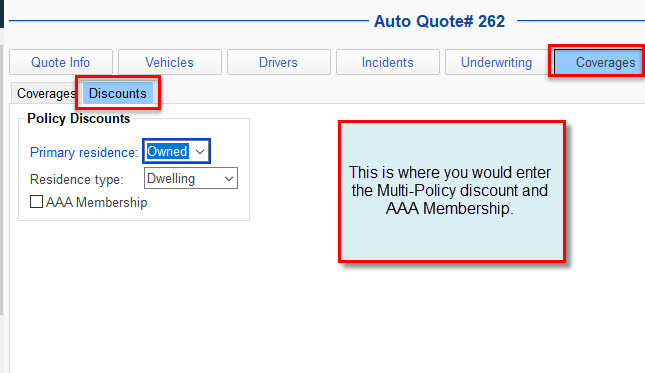
Step 9: Next you will click on the ‘Discounts’ tab to apply any applicable discounts.
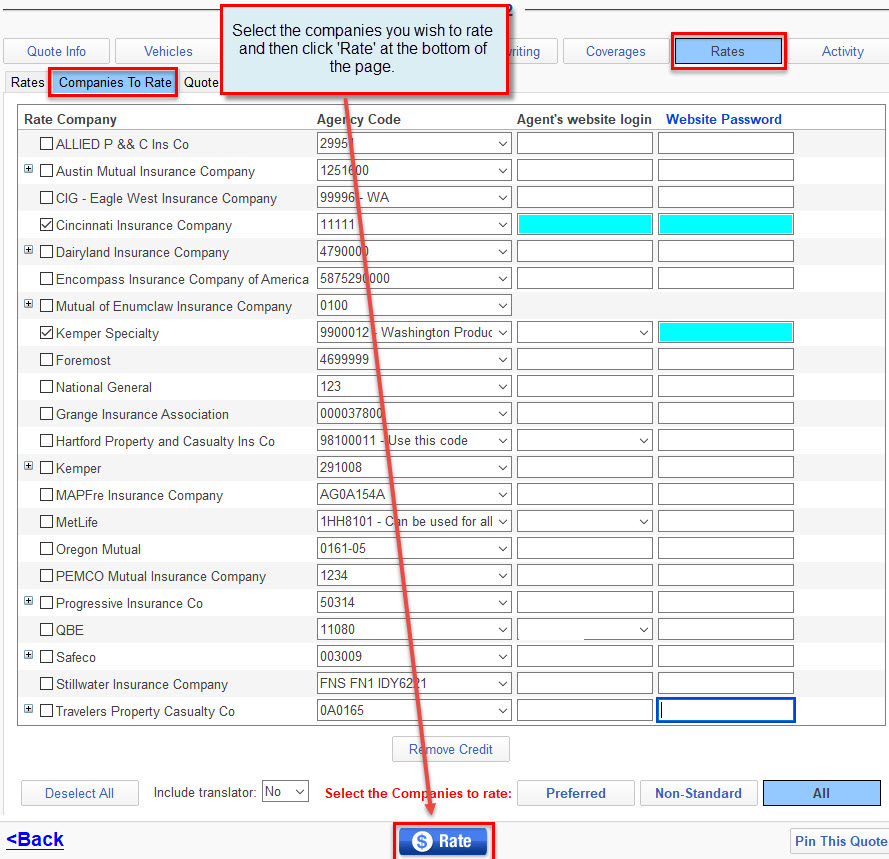
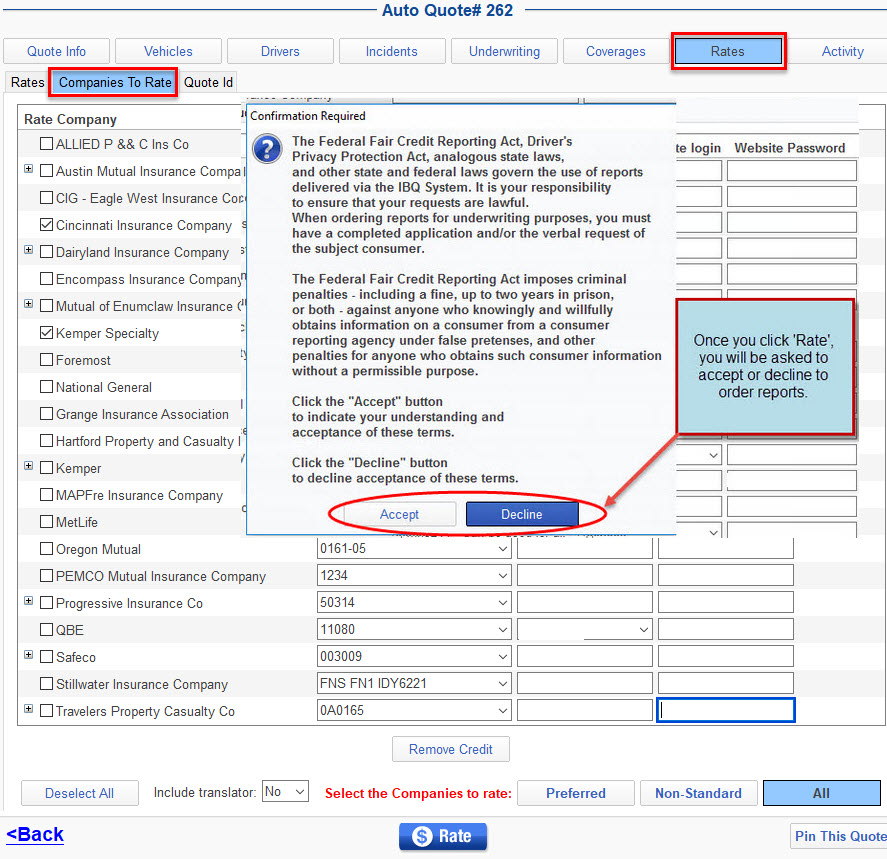
Step 10: You may select or de-select the companies you wish to rate here. You may also update website logins and passwords and select which Agency code you would like to use here. You would then click ‘Rate’ at the bottom of the page.
Step 11: Once you click ‘Rate’, you will be asked to accept or decline to order reports.
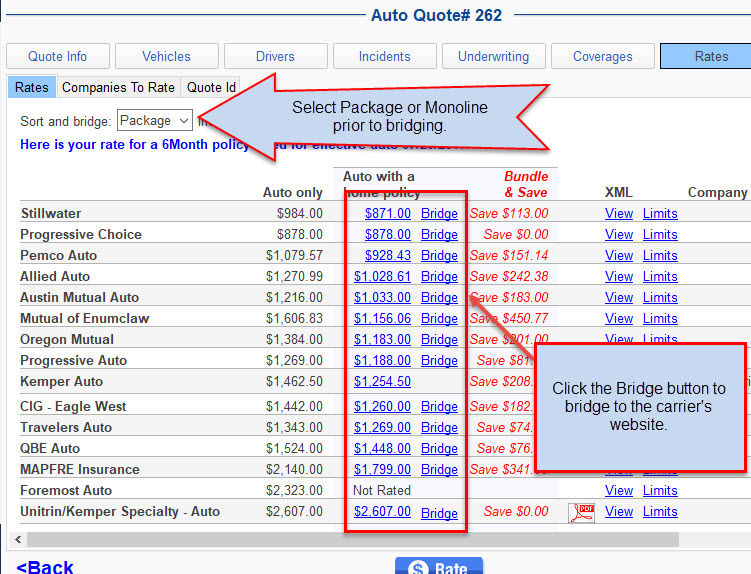
Step 12: Select Package or Monoline prior to rating. Rates will appear for both Package and Monoline. You will bridge to what is selected.
Click the ‘Bridge’ button to complete the application.
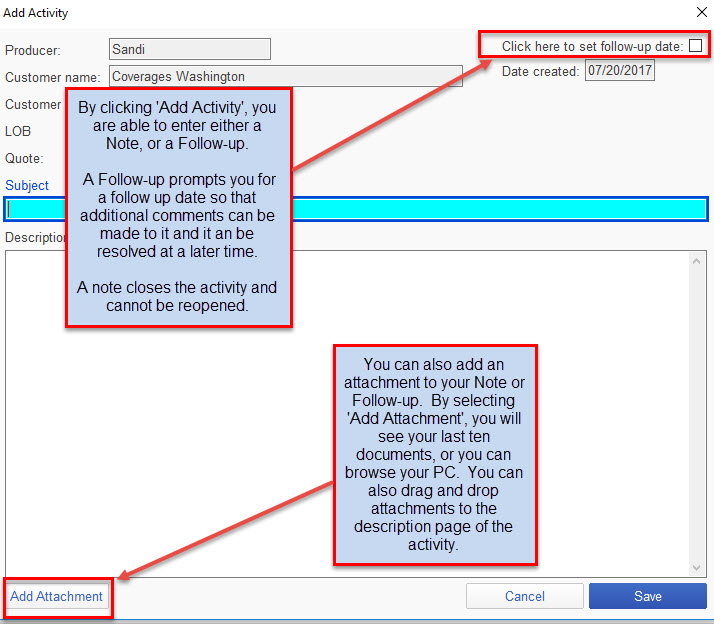
Step 13: The Activity tab allows you to enter either a Note or a Follow-up Activity. A Follow-up Activity will prompt you for a Follow up date. Once an Activity is complete, you are able to mark it as resolved.